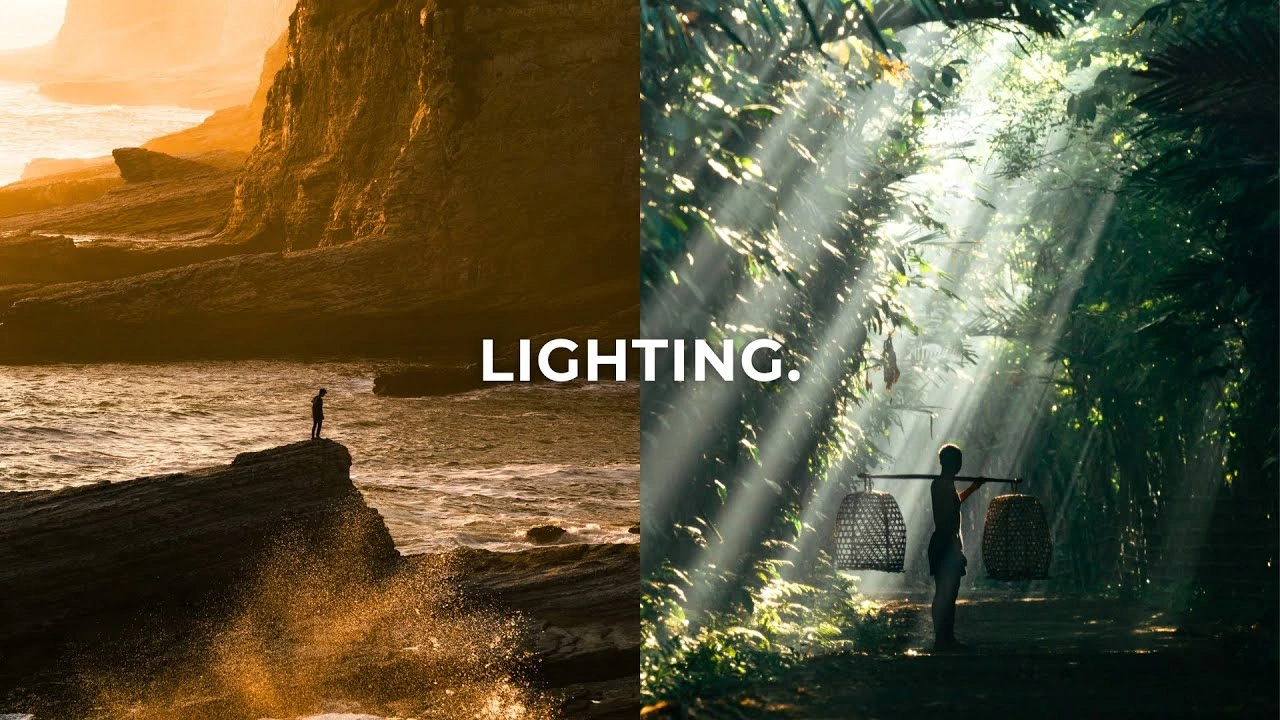
Photography Lighting Basics in 2026: A Beginner’s Complete Guide
Cutout Partner
April 8, 2026
0 views
In 2026, photography has evolved into a highly competitive and visually demanding field where image quality is no longer optional—it is expected. Whether you are a professional photographer, a studio manager, or an eCommerce business owner, lighting plays a defining role in how your images are perceived. It is the foundation that determines clarity, depth, mood, and overall professionalism in every shot you capture.
Lighting is not just about making a subject visible; it is about shaping the story behind the image. The way light falls on a product or a person can dramatically change how it looks, feels, and communicates with the viewer. A well-lit image appears polished and trustworthy, while poor lighting can instantly reduce its value, no matter how expensive the camera or lens used.
For eCommerce businesses especially, where customers rely entirely on visuals to make purchasing decisions, lighting directly influences conversions. Clean, consistent, and professionally lit images create confidence and credibility. This is also where expert post-production services like Cutout Partner, a top leading post-production and image editing solution provider, become highly effective. However, even the best editing starts with a well-lit image.
Mastering lighting is therefore not just a technical skill—it is a strategic advantage.
What is General Photography Lighting?
Photography lighting refers to the use and control of light to illuminate a subject in a way that enhances its appearance and communicates a specific visual message. Light defines everything in an image, from highlights and shadows to texture and color accuracy.
There are two main types of lighting: natural and artificial. Natural light comes from the sun and is widely appreciated for its softness and realism, especially when used through windows or during golden hours. Artificial light, on the other hand, includes studio lights, LED panels, and flash systems, offering photographers full control over intensity, direction, and consistency.
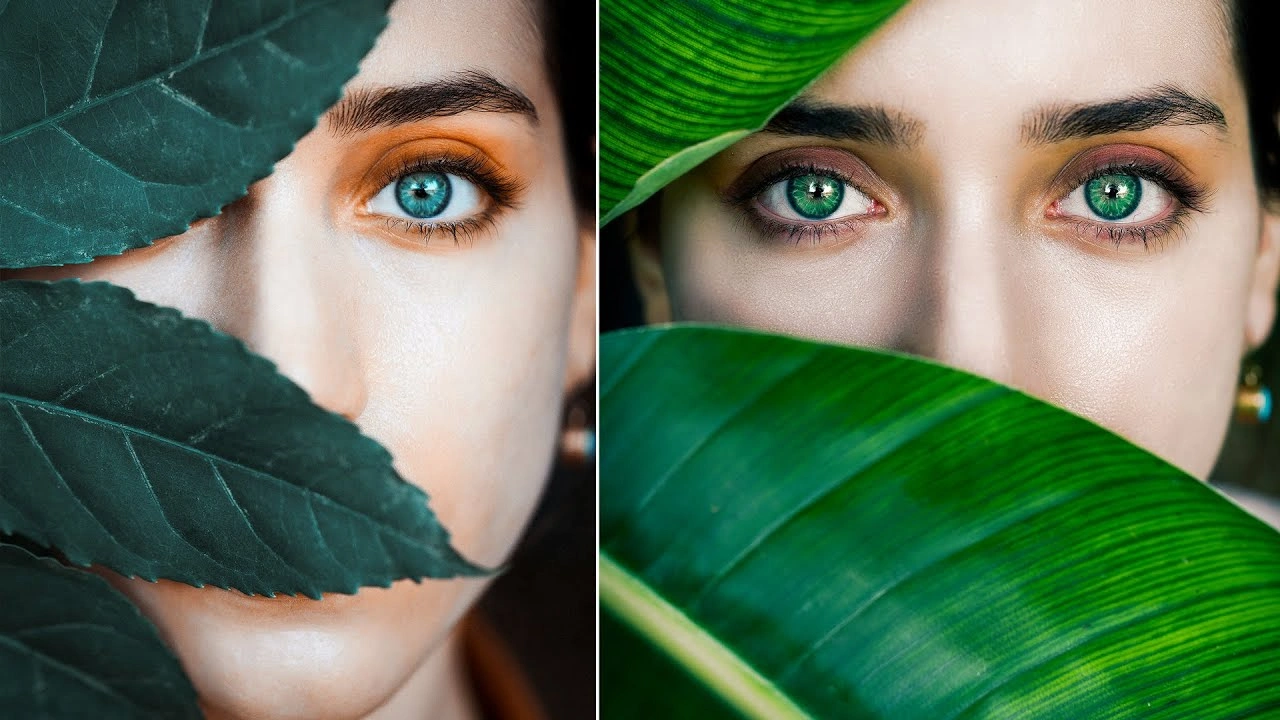
Light also shapes texture and depth. Soft, diffused light reduces harsh shadows and creates a smooth look, while hard light enhances texture and creates strong contrast. Understanding how to manipulate light allows photographers to control the visual outcome with precision.
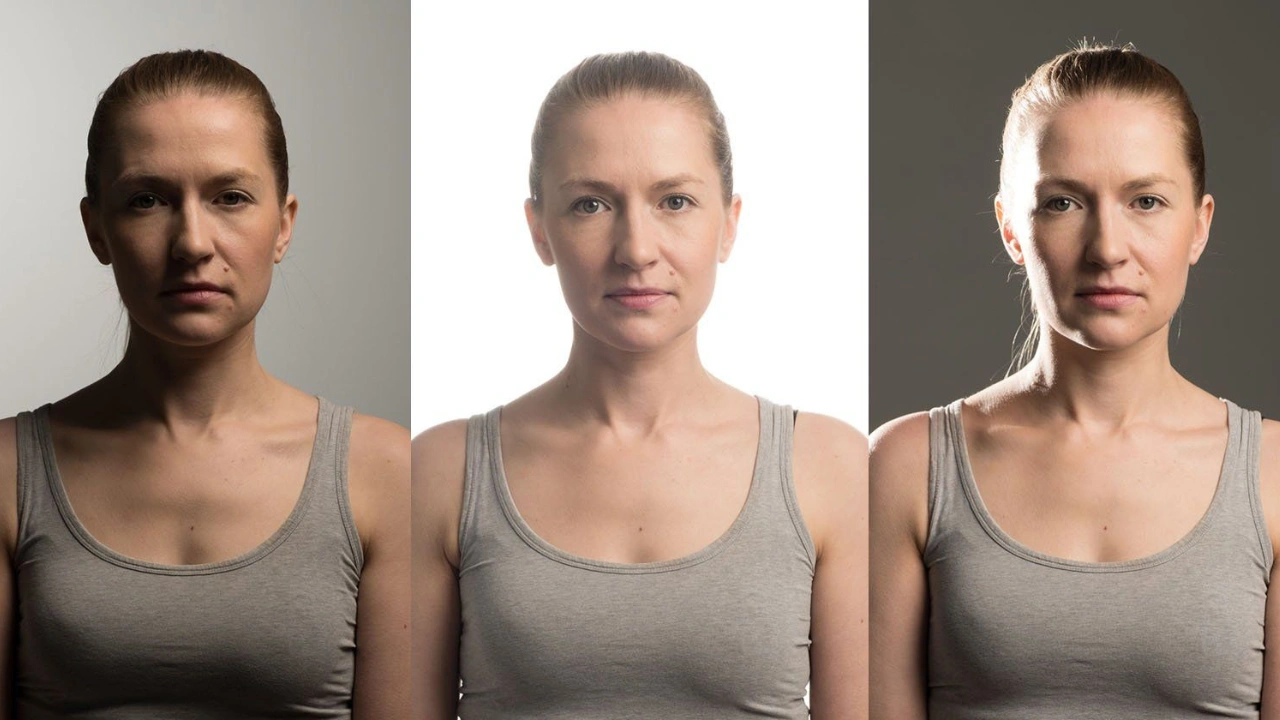
What Is Good Light in Product Photography?
Good light in photography is not defined by a single rule or setup, but by how well it supports the subject, mood, and purpose of the image. The “best” lighting depends entirely on what you are trying to achieve. In some cases, soft light with gentle shadows and smooth highlights creates a clean and flattering look, while in other situations, harder light with stronger contrast adds depth, drama, and texture.
Natural light can be ideal when you want authenticity and simplicity, especially for lifestyle or product photography. On the other hand, controlled artificial lighting allows you to shape the scene precisely, which is often essential in studio environments or commercial work. The key is to make intentional decisions rather than relying on the same lighting setup for every shoot, unless consistency is your goal.
It is also important to consider the size of your subject when choosing lighting tools. Smaller subjects may only require compact diffusers, while larger subjects, such as people or full product setups, benefit from bigger modifiers like umbrellas or softboxes. Regardless of scale, the fundamental principles of light direction, softness, and control remain the same, allowing you to adapt your setup while maintaining professional results.
Different Types of Lighting in Photography
Understanding different types of lighting is essential for building a strong foundation.
Natural light includes direct sunlight, diffused daylight, and window light. It is ideal for lifestyle and product photography when a natural look is desired.
Artificial lighting includes studio strobes, continuous LED lights, and flash systems. These provide consistent results and are essential for professional studio setups.
Continuous lighting allows photographers to see how light falls on the subject in real time, making it beginner-friendly. Strobe lighting, often used in professional studios, delivers powerful bursts of light and is ideal for high-quality, sharp images.
Hard light produces strong shadows and high contrast, while soft light creates gentle transitions and even illumination. Choosing between them depends on the style and purpose of the shoot.
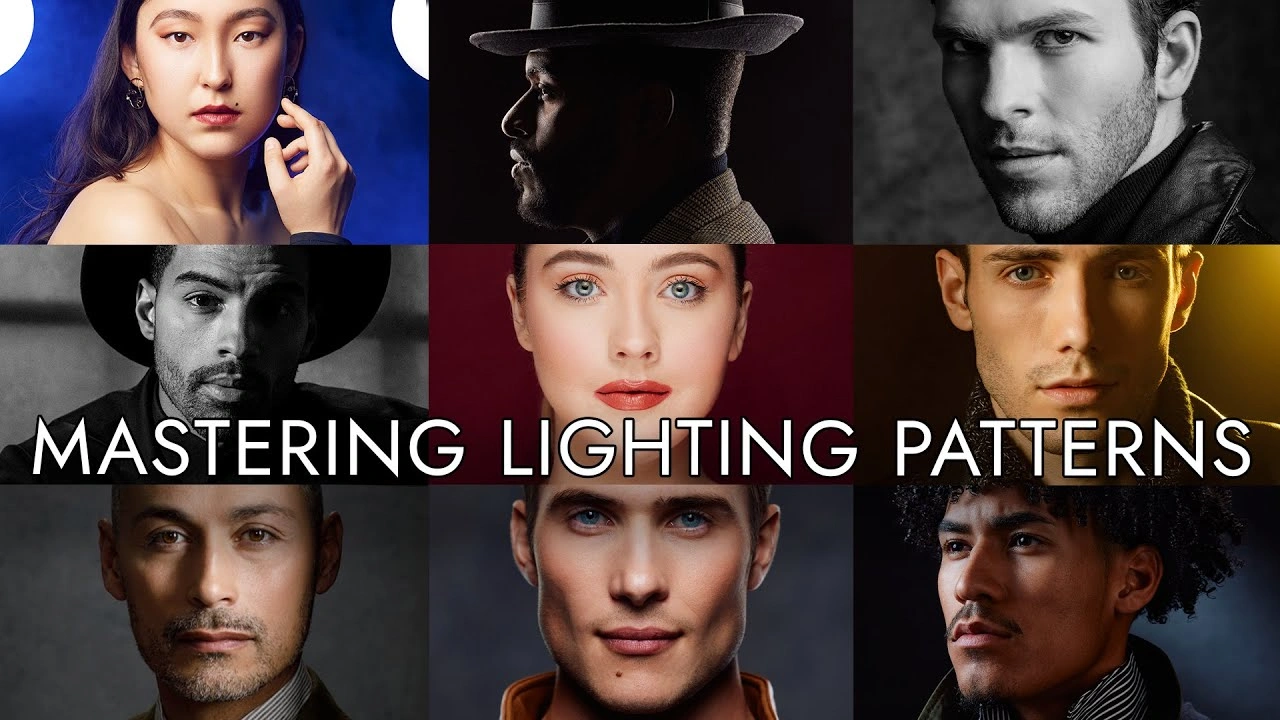
Basic Lighting Techniques Every Photographer Should Know
A strong understanding of basic lighting techniques is crucial for achieving professional results.
The key light is the main source of illumination, defining the subject’s shape and form. The fill light softens shadows created by the key light, while the backlight separates the subject from the background, adding depth.
The three-point lighting setup, consisting of key, fill, and backlight, is a standard approach used in studios for balanced and professional lighting.
High-key lighting uses bright, even light with minimal shadows, commonly used in eCommerce and fashion photography. Low-key lighting, on the other hand, emphasizes shadows and contrast, creating a dramatic effect.
The direction of light also matters significantly. Front lighting reduces shadows, side lighting enhances texture, backlighting creates silhouettes, and top lighting adds depth.
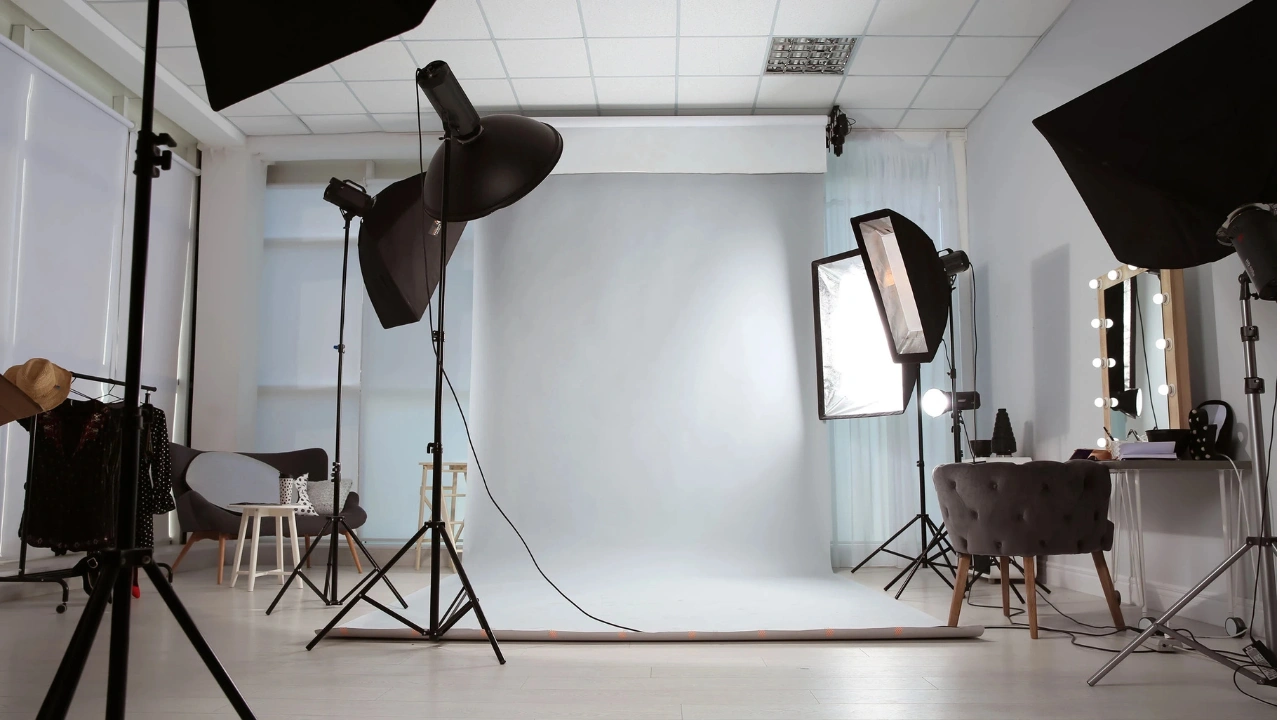
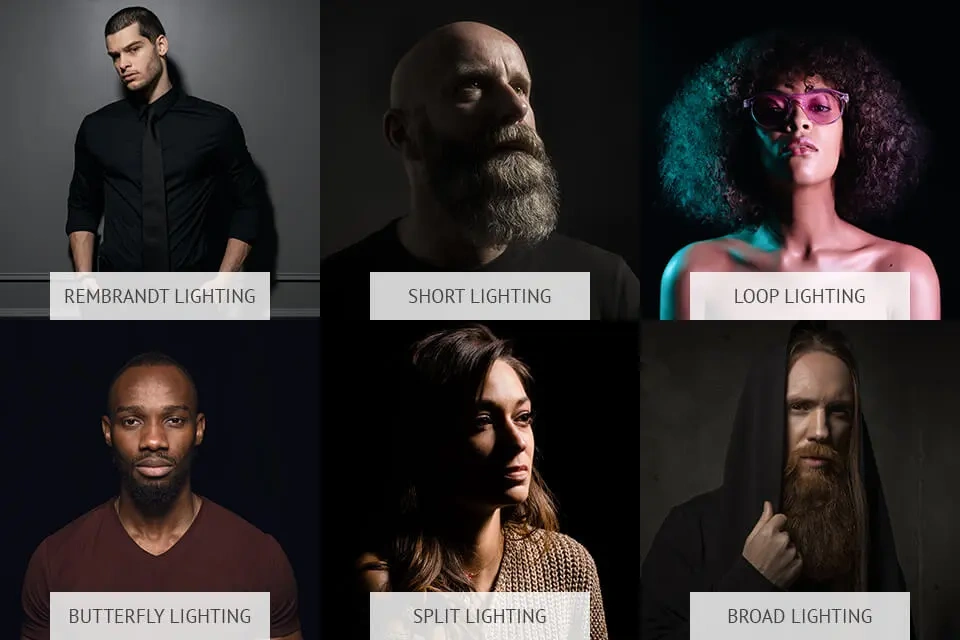
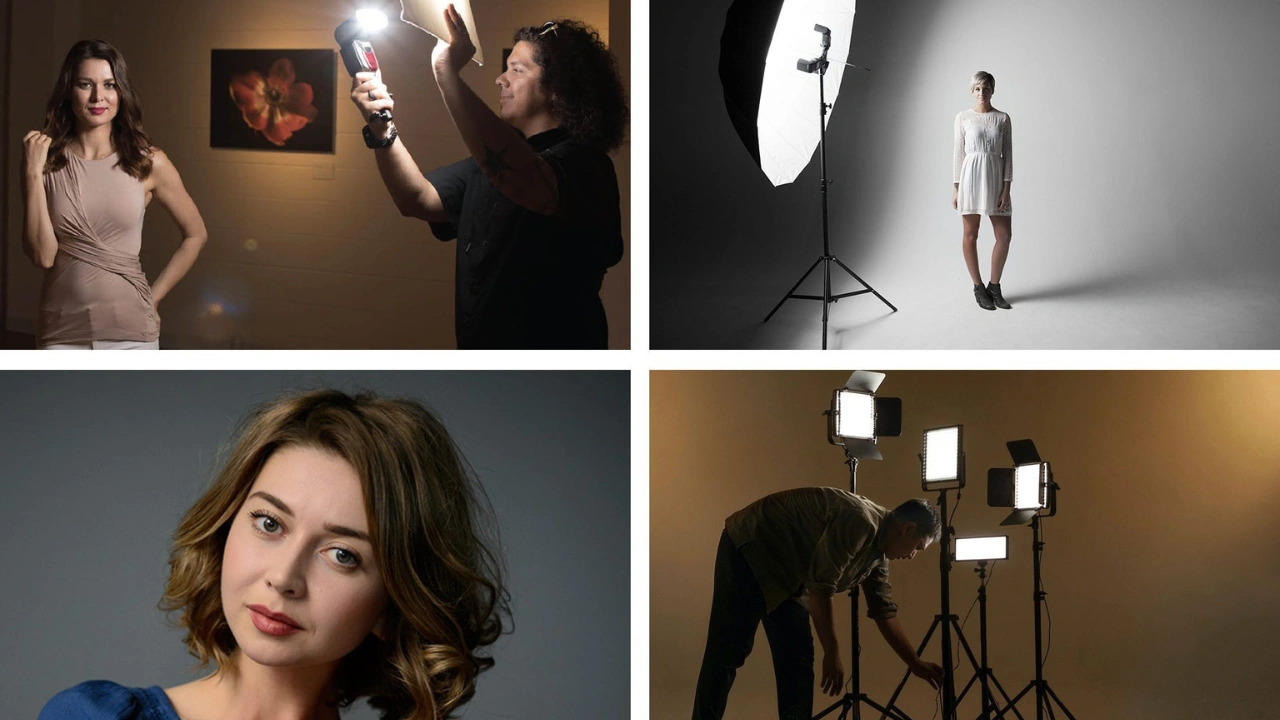
Lighting Equipment for Professionals with Master Lighting Patterns
Lighting equipment has become more advanced and accessible in 2026, offering options for both beginners and professionals.
Softboxes and umbrellas are widely used to diffuse light and create a soft, even glow. Reflectors help bounce light back onto the subject, reducing shadows without adding extra light sources.
LED panels and ring lights are popular for their portability and ease of use, especially for small studios and content creators. Light modifiers such as grids, diffusers, and gels allow photographers to control the quality and color of light.
While budget-friendly gear is sufficient for beginners, professional setups offer greater control, durability, and consistency, making them ideal for high-volume production environments.
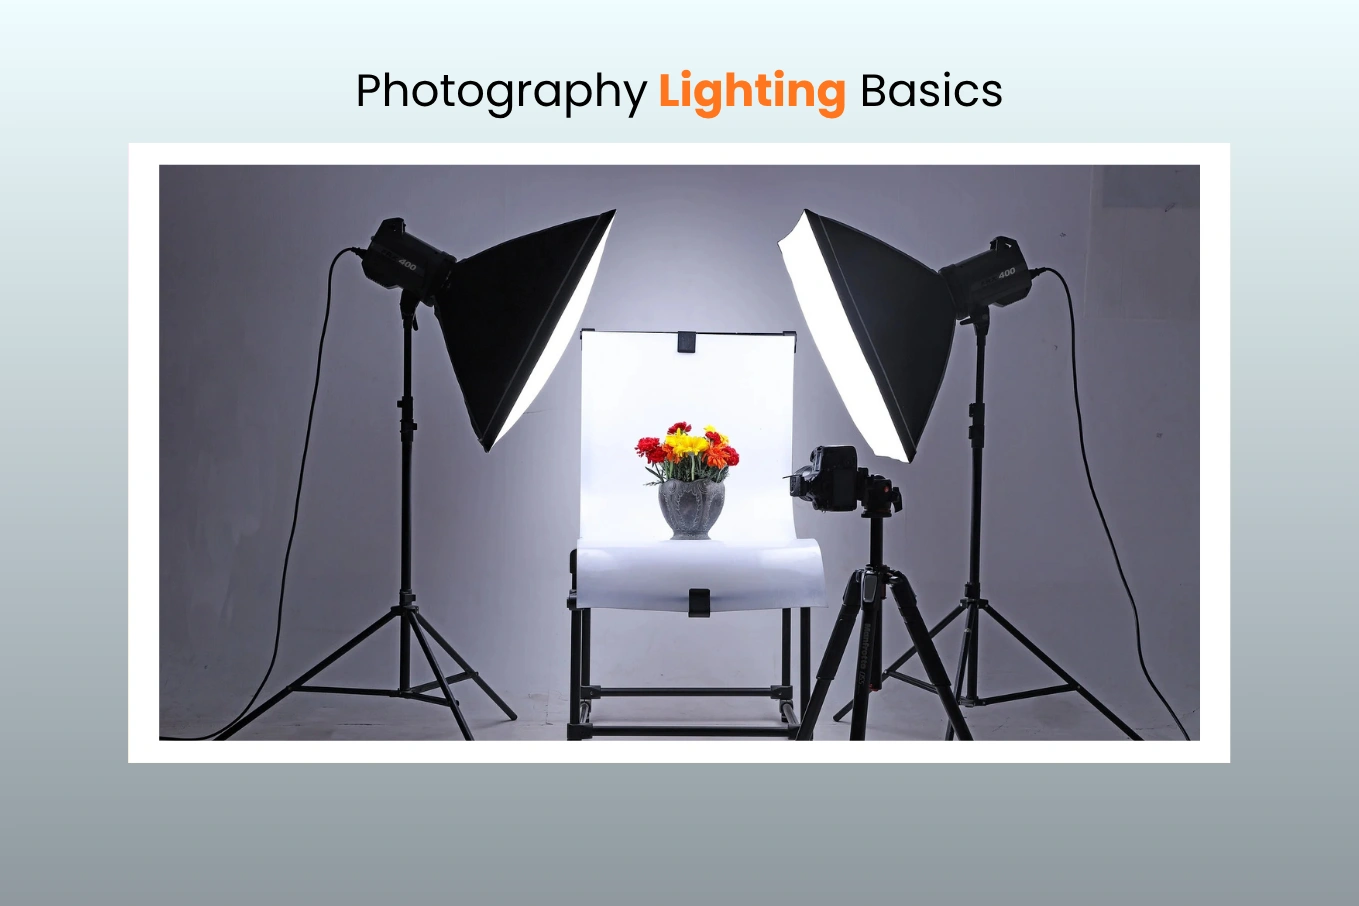
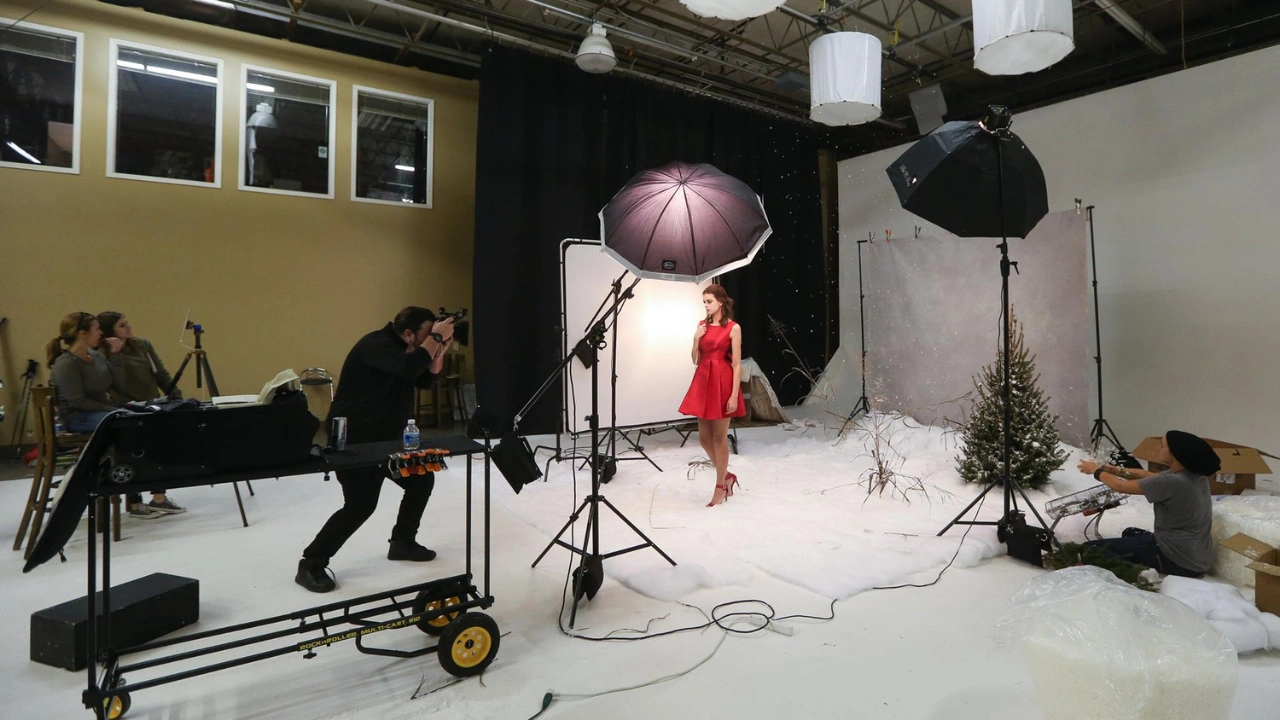
Lighting Setup for Product Photography
Product photography demands precision and consistency, making lighting setup critical.
A clean background requires even lighting to avoid shadows and color inconsistencies. Using diffused light helps create a smooth, professional look.
Shadow control is essential. Soft shadows can add depth, but harsh shadows can distract from the product. Adjusting light angles and using reflectors helps achieve balance.
Reflective products such as glass or metal require careful positioning of lights to avoid unwanted reflections, while matte products benefit from even lighting to highlight texture.
Consistency is key in eCommerce. Using the same lighting setup across multiple shoots ensures uniformity, which strengthens brand identity.
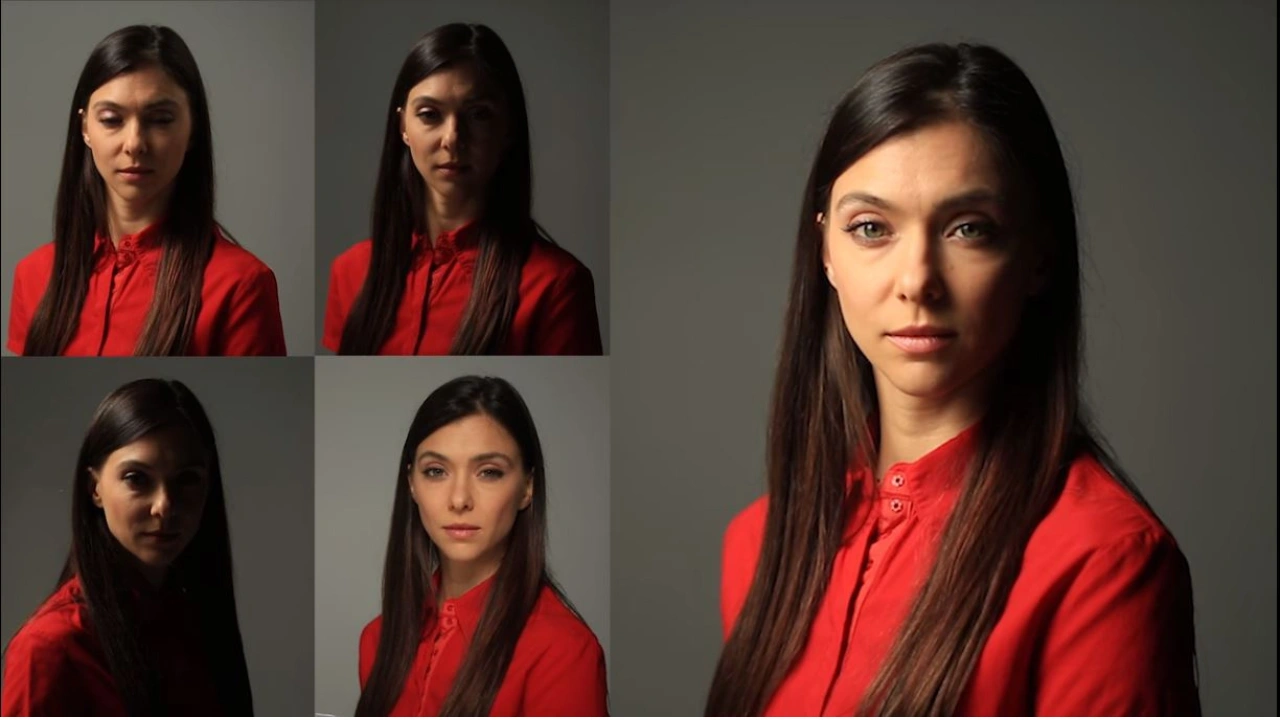
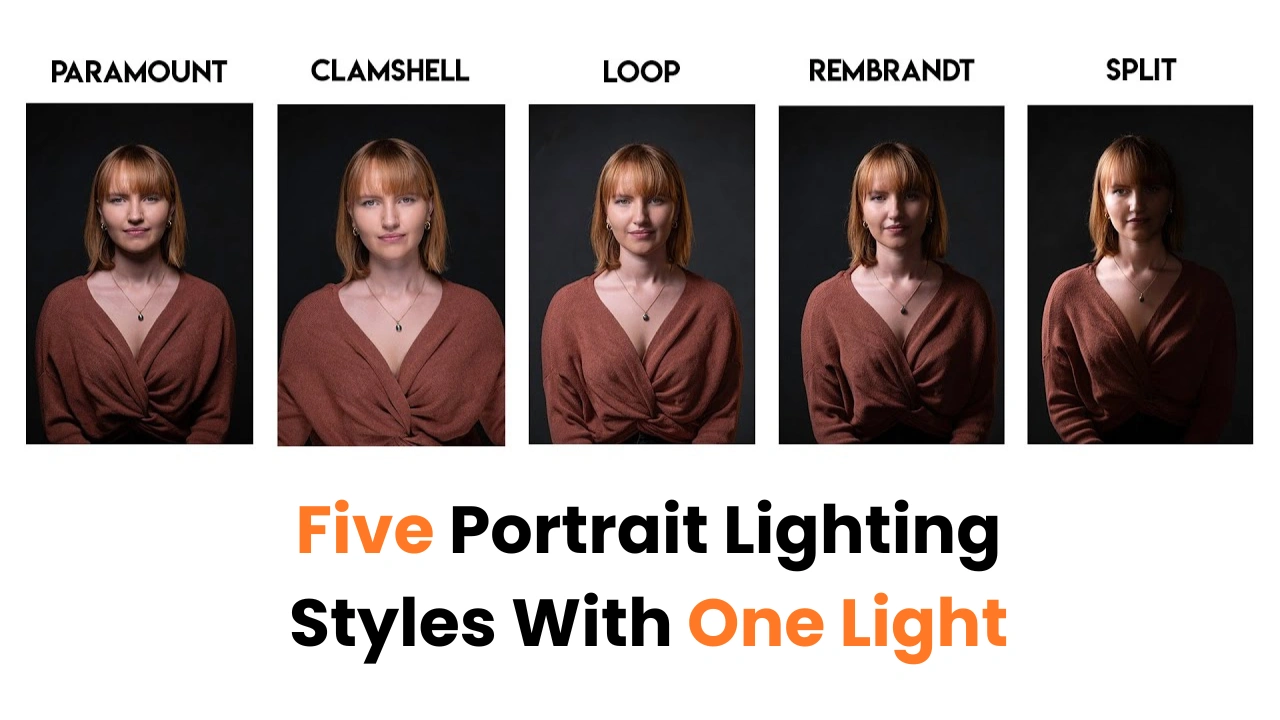
Studio Lighting Workflow for Professionals with 5 Portrait Lighting in One Light
An organized lighting workflow improves efficiency and consistency in professional environments.
Setting up dedicated lighting zones for different types of shoots helps streamline operations. Maintaining consistent lighting setups ensures that images remain uniform across projects.
For multi-product shoots, pre-configured lighting setups save time and reduce errors. Studio managers should also establish clear guidelines for lighting placement and adjustments.
Lighting plays a major role in brand consistency, especially for eCommerce businesses that rely on uniform product images across their platforms.
What to Look for in a Flash
While many cameras come with a built-in flash, investing in an external flash unit (also known as a speedlight) gives you far greater control. When choosing a flash, look for two key features:
TTL (Through The Lens) and manual mode.
TTL allows the camera to automatically adjust flash power based on the scene, which is especially helpful in fast-paced environments like events or weddings. On the other hand, manual mode gives you full control over the flash output, making it ideal for studio and controlled setups.
Another important feature is the ability to use the flash off-camera. This can be achieved using cables or, more conveniently, wireless radio triggers. Off-camera flash opens up endless creative possibilities by allowing you to control the direction, intensity, and quality of light.
Connecting the Flash to Your Camera With Bunch Light Photography
Flashes can be used in two main ways: mounted on the camera’s hot shoe or placed off-camera. While on-camera flash can be convenient for quick shots, it often results in flat and uninteresting lighting.
Using your flash off-camera is highly recommended, as it allows you to shape light more creatively. You can experiment with angles, shadows, and depth to create more professional-looking images.
For beginners on a budget, affordable manual flashes and sync cables are available. However, wireless triggers are a better long-term investment, as they eliminate the need for cables and make your setup more flexible and efficient.
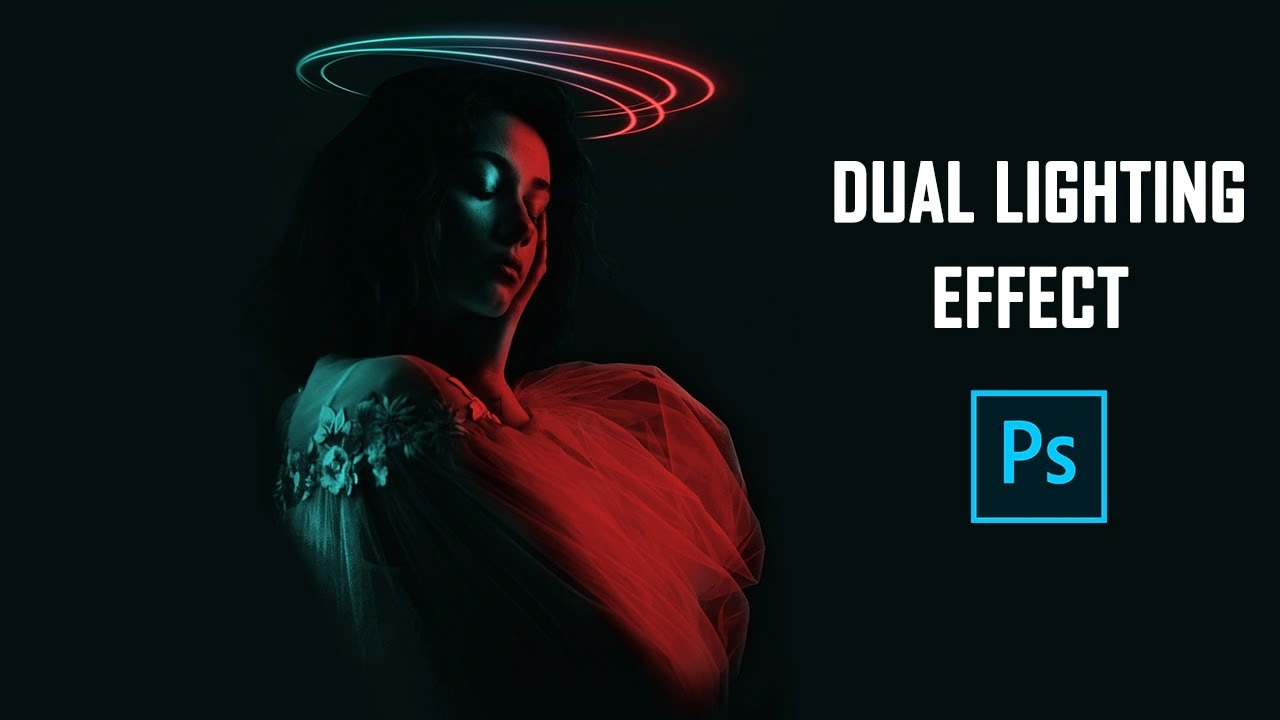
Using Dual Lighting and Creative Effects
Once you’re comfortable with a single flash, you can experiment with using two flashes simultaneously. This technique can add depth and drama to your images.
For example, one flash can be used as the main light, while the second acts as a backlight or rim light to highlight the subject’s outline. This creates a more dynamic and visually striking effect.
However, it’s important to understand that adding more flashes does not automatically create soft light. Without modifiers like diffusers or reflectors, multiple flashes can still produce harsh lighting. Proper light shaping is key to achieving a soft, professional look.
Flash vs. Constant Lighting
Many beginners are drawn to constant lighting because it allows them to see exactly how the light falls on the subject in real time. While this can be helpful for learning, constant lights are generally not ideal for still photography.
The main limitation is brightness. Most constant lights are not powerful enough to properly illuminate a scene or freeze motion. Flash, on the other hand, provides a burst of intense light that can capture sharp images even in low-light conditions.
For this reason, flashes are typically the preferred choice for still photography, while constant lights are more suited for video work.
Common Lighting Mistakes to Avoid with Photography Lighting
Even experienced photographers can make lighting mistakes that affect image quality.
Overexposure and underexposure can result in loss of detail, making images unusable. Harsh shadows and uneven lighting can distract from the subject.
Incorrect color temperature can lead to unnatural tones, especially in product photography. Poor placement of lights often results in flat or unbalanced images.
Avoiding these mistakes requires attention to detail and a solid understanding of lighting principles.
How Lighting Impacts Post-Production
Lighting directly affects the efficiency and quality of post-production.
Well-lit images require less editing, saving time and resources. Accurate lighting ensures better color consistency, which is crucial for eCommerce.
Cutout Partner, as a leading post-production and image editing solution provider, works most effectively with high-quality source images. Proper lighting reduces the need for heavy corrections, allowing for faster turnaround and better results.
For businesses handling large volumes of images, good lighting translates into smoother workflows and improved productivity.
Lighting Tips for Different Photography Styles
Different photography styles require different lighting approaches.
Portrait photography benefits from soft, flattering light that enhances skin tones. Product photography requires even, controlled lighting for accuracy.
Fashion photography often uses dynamic lighting to create mood and highlight textures. Outdoor shoots rely on natural light, while studio shoots provide full control.
Understanding these variations helps photographers adapt to different scenarios effectively.
Advanced Lighting Trends in 2026
Lighting technology continues to evolve, offering new possibilities.
Smart lighting systems allow photographers to control settings remotely and maintain consistency. AI-assisted setups can automatically adjust lighting based on the subject.
Portable and wireless lighting gear provides flexibility for on-location shoots. Sustainable lighting solutions are becoming more popular, focusing on energy efficiency.
These advancements are shaping the future of photography.
Practical Tips for Mastering Lighting
Mastering lighting requires continuous practice and experimentation.
Understanding how light behaves in different conditions is essential. Trying different setups helps develop a deeper understanding of techniques.
Learning from real-world shoots and analyzing results improves skills over time. Consistency and attention to detail are key to achieving professional results.
Ways to Modify Light for More Flattering Photos
Light can make or break a photo. Even the best camera and composition won’t save an image if the lighting is too harsh or unbalanced. The good news is that you don’t always need expensive gear to improve your lighting—understanding how to modify light can instantly elevate your results, whether you’re shooting outdoors or indoors.
Use Natural Elements as Light Modifiers (Outdoor Photography)
When shooting outside, the sun is your main light source—but it can also be very harsh, especially during midday. This is why many photographers prefer shooting during early morning or late evening when the sun is lower in the sky, producing softer and warmer light.
However, if you’re shooting in the middle of the day and can’t change the timing, nature provides excellent solutions:
- Clouds act as a natural diffuser, softening sunlight and reducing harsh shadows. Cloudy days are ideal for evenly lit, flattering portraits.
- Trees and buildings create what’s known as open shade. This means your subject is in the shade but still receiving indirect light from the surroundings, resulting in soft, balanced exposure.
Learning to spot and use these natural modifiers can dramatically improve your outdoor photography without any extra equipment.
Bounce Light Indoors for Soft Results
When working indoors, you can easily modify light using everyday objects. One of the simplest techniques is bouncing light off surfaces:
- White or light-colored walls reflect light and spread it more evenly across your subject
- Ceilings can also be used to bounce light downward for a softer effect
- Even simple items like a white pillow, foam board, or poster board can act as reflectors
These methods help reduce harsh shadows and create a more flattering, natural look. Professional tools like softboxes and shoot-through umbrellas work on the same principle—but you can achieve great results with DIY solutions too.
Use Light Modifiers for Better Control
If you want more precision, you can use dedicated light modifiers such as:
- Softboxes – create soft, diffused light
- Umbrellas – spread light over a wider area
- Reflectors – redirect light to fill in shadows
These tools help you shape the light exactly how you want, making them especially useful for portraits and product photography.
Control Light Distance for Different Effects
One of the most powerful (and often overlooked) ways to modify light is simply by adjusting the distance between the light source and your subject:
- Closer light = softer light with smoother shadows
- Farther light = harsher, more direct light with stronger contrast
By moving your subject closer to or farther from the light source, you can quickly change the mood and feel of your image without changing any equipment.
Final Thoughts
Lighting is the backbone of photography, influencing every aspect of an image from clarity to emotion. For photographers, studio managers, and eCommerce business owners, mastering lighting is essential for producing high-quality visuals that stand out in a competitive market.
By investing time in understanding lighting principles, experimenting with techniques, and maintaining consistent workflows, professionals can significantly enhance their output. Combined with expert post-production support from Cutout Partner, these efforts ensure that every image meets the highest standards of quality and professionalism.
In the end, great photography is not just about capturing a moment—it is about shaping it with light.
Take Your Photography Editing Results to the Next Level
Great photography begins with strong lighting, and mastering it can dramatically improve the quality of your images. Whether you are capturing products, portraits, or commercial work, the right lighting setup ensures clean, sharp, and professional results from the start.
But capturing a great image is only half the process. To truly stand out, your photos need expert finishing. That’s where Cutout Partner makes a difference. As a top leading post-production and image editing solution provider, Cutout Partner helps photographers, studios, and eCommerce businesses transform well-shot images into polished, high-impact visuals.
If you are looking to save time, maintain consistency, and deliver premium-quality results to your clients, now is the perfect moment to upgrade your workflow.
Contact Cutout Partner today to streamline your editing process and achieve professional-grade results for every image.
Share this post

Ready to transform your images?
Elevate your brand with stunning, high-impact visuals. We’ll refine your photos to leave a lasting impression!
Get Started Now!