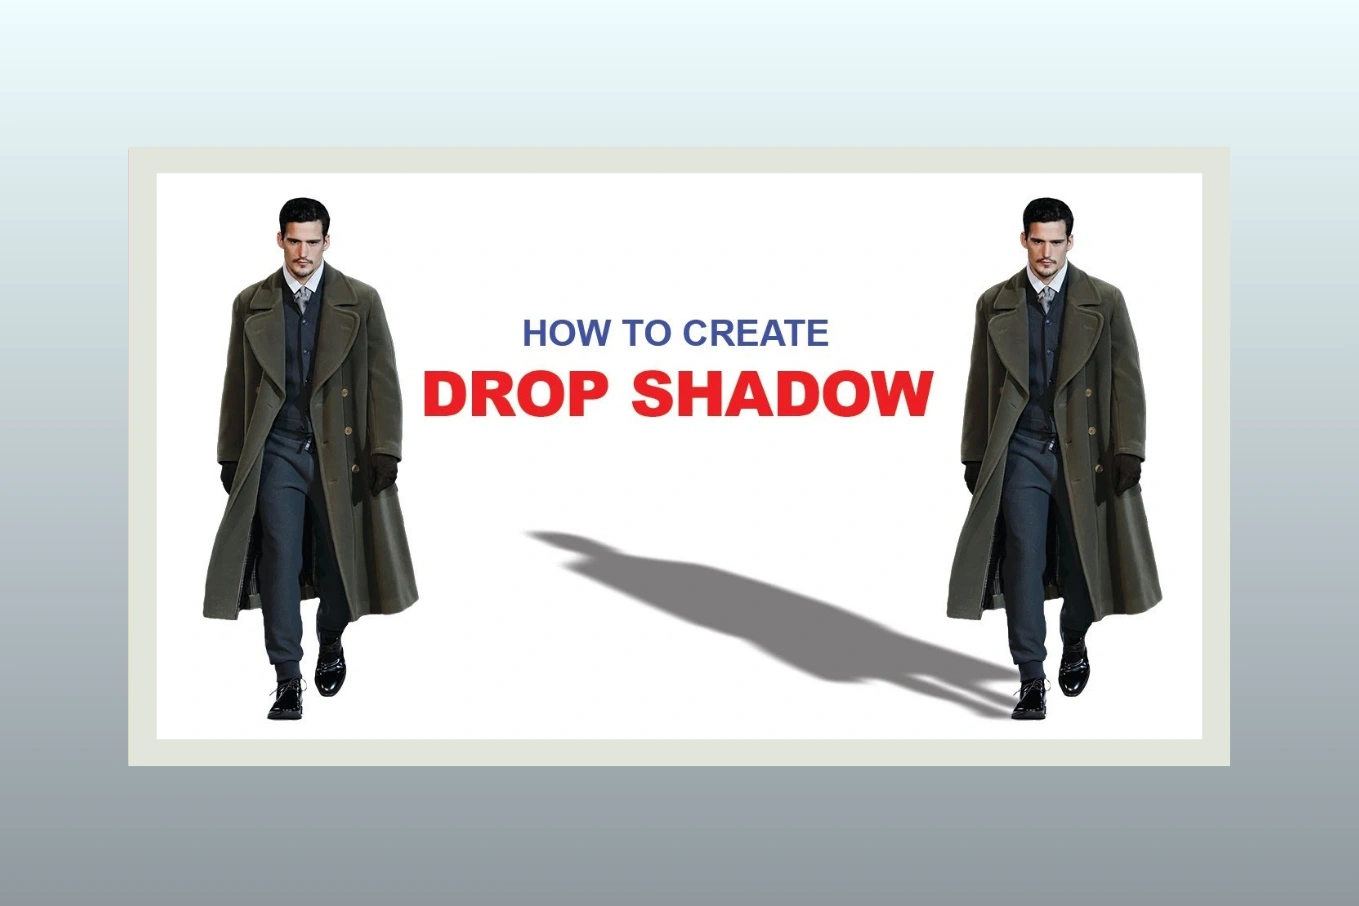
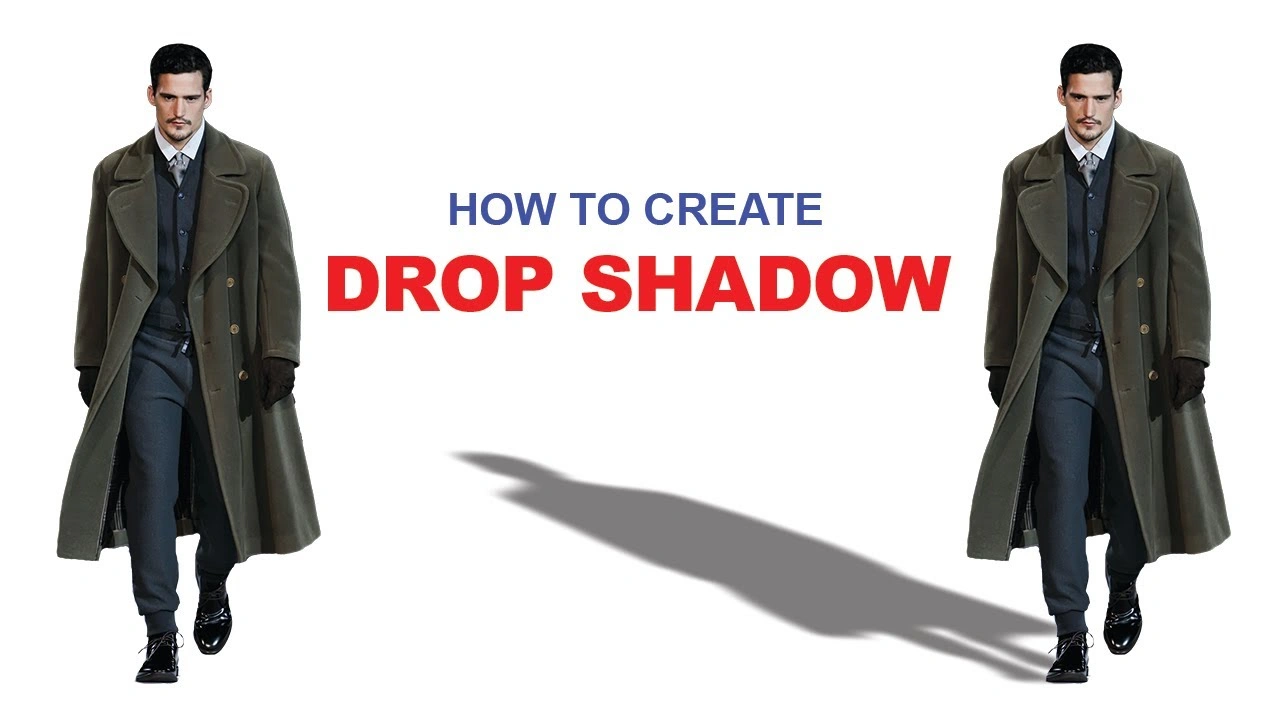
How to Make a Drop Shadow in Photoshop: A Easy Guide in 2026
Cutout Partner
February 9, 2026
0 views
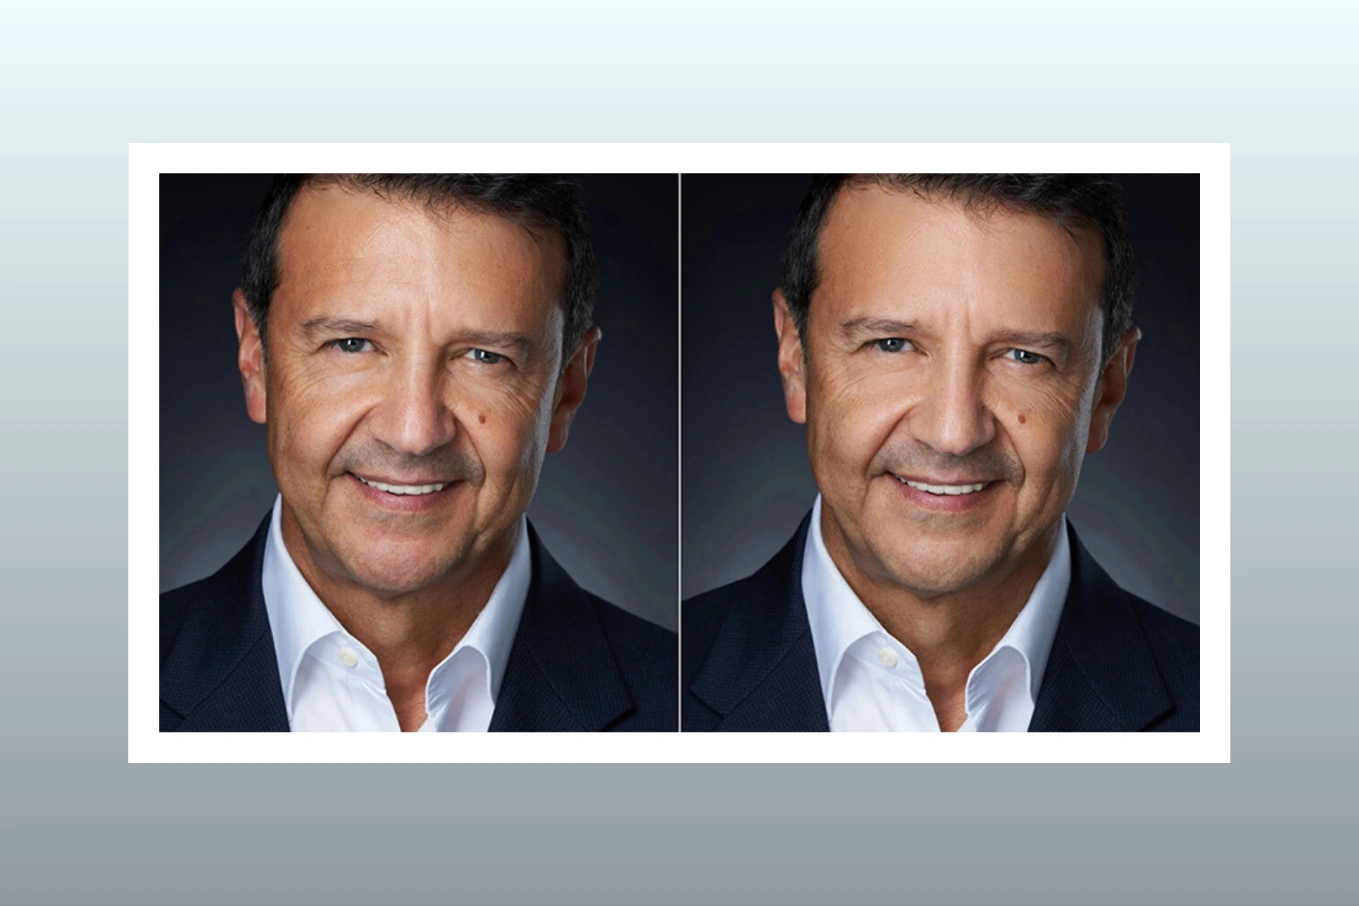
A well-crafted drop shadow can quietly transform an ordinary image into something that feels grounded, realistic, and visually convincing. Whether you are editing product photos for an online store, designing marketing graphics, or retouching images for professional use, knowing how to make a drop shadow in Photoshop is a skill that separates amateur edits from polished, professional results. Shadows tell the viewer where an object exists in space, how it relates to light, and whether the image feels believable or artificial.
This guide is written to help beginners and intermediate users understand drop shadows from the ground up while also sharing professional techniques used in high-end photo retouching workflows. Every step is explained clearly, with smooth transitions and practical insight, so the process feels approachable rather than technical or overwhelming. By the end, you will not only know how to create a drop shadow in Photoshop, but also how to control it with confidence to achieve consistent, realistic outcomes across different types of images.
What is drop Shadow in Photoshop
A drop shadow is a visual effect that creates the impression that a layer in a Photoshop project is slightly lifted above the background and casting a shadow onto the layer beneath it. By adding this shadow, the image gains a sense of depth and separation, helping it feel more realistic rather than flat. Drop shadows are commonly used to suggest that an object exists in three-dimensional space, making it appear grounded, layered, and naturally influenced by light within the scene.
Create a convincing photo composite:

1. Match the Lighting First
Before anything else, study the original photo. Notice where the light comes from, how strong it is, and whether it’s warm or cool. Adjust the brightness, contrast, highlights, and shadows of the new element so they match the existing lighting. If the light direction is wrong, even a perfect cutout will look fake.
2. Use a Clean, Accurate Cutout
A precise selection is essential. Refine edges carefully, especially around hair, fabric, or soft details. Avoid harsh edges unless the original photo has strong contrast. Slight feathering or edge refinement helps the object blend naturally.
3. Add a Realistic Drop Shadow
When placing a new element into a scene, a drop shadow helps anchor it to the environment.
To make the shadow look natural:
- Keep the shadow soft, not sharp
- Lower the opacity so it’s subtle
- Match the shadow direction to the existing light source
- Blur the shadow slightly for realism
Shadows should fade naturally, not appear as solid shapes.
4. Match Color and Tone
Use color correction tools to balance the added object with the rest of the image. Adjust:
- White balance
- Color temperature
- Saturation
If the background is slightly faded or muted, the new element should be too. Perfect color accuracy often looks unnatural if the rest of the image isn’t perfect.
5. Add Natural Depth and Blur
Check the depth of field in the original photo. If the background is slightly blurred, apply a similar blur to the new element if it’s meant to sit further back in the scene. This step greatly improves realism.
6. Blend With Texture and Grain
Many photos have natural grain, noise, or texture. Add a small amount of matching grain to the new element so it doesn’t look overly smooth compared to the rest of the image.
7. Final Check: Zoom In and Out
Zoom in to check edges and shadows, then zoom out to see the overall realism. If nothing draws attention or feels “pasted on,” your composite is working.
Make your layout more legible by improving text contrast.

Adding subtle drop shadows to text helps it stand out from the background, making the content easier to read without distracting from the design.
If you want a slightly more instructional tone, here’s another option:
Improve layout readability.
Use soft, well-balanced drop shadows on text to separate it from busy or low-contrast backgrounds, ensuring clear and comfortable reading.
Add Realistic Lighting
To make your photo appear natural, pay close attention to lighting. When fine-tuning:
- Adjust Drop Shadow settings on any added elements so the direction, softness, and opacity of shadows match the original scene.
- Ensure all shadows align with the primary light source to create a cohesive, realistic look.
- Subtle tweaks to brightness, contrast, and highlights can help the new element blend seamlessly.
Tip: Consistent lighting is key—if shadows or highlights feel off, even a well-cut object will look out of place.
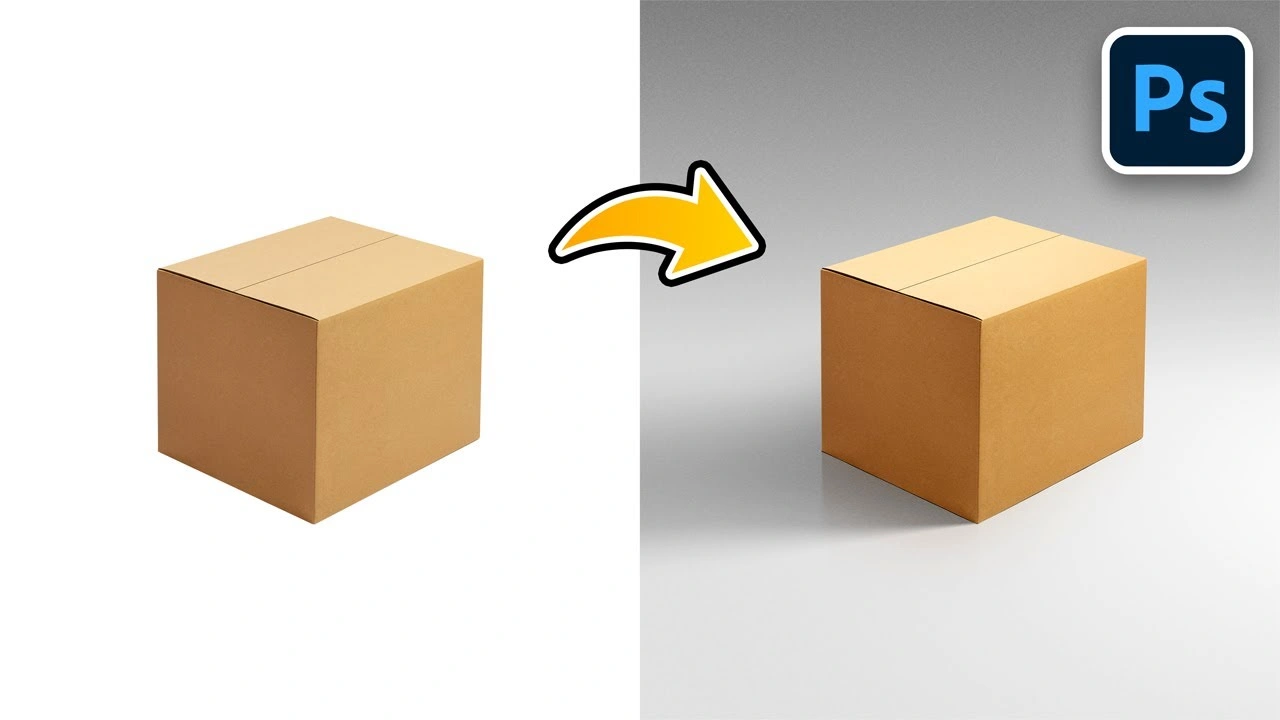
Punch Up Your Product Photography
When showcasing a product for sale, small details can make a big difference.
- Add a subtle drop shadow beneath the product to give it depth and make it appear grounded in the scene.
- Adjust the shadow’s direction, blur, and opacity to match the lighting, creating a more realistic and visually appealing image.
Understanding What a Drop Shadow Is and Why It Matters
A drop shadow is a visual effect that simulates the shadow an object would cast when light hits it from a particular direction. In Photoshop, a drop shadow helps an object appear lifted from the background instead of floating unnaturally. While the effect itself is simple, its impact is powerful when done correctly and distracting when done poorly.
In professional photo editing, shadows play a key role in realism. Product photography relies on accurate shadows to show depth and scale, especially in eCommerce where customers cannot physically touch the item. Marketing visuals use shadows to draw attention, create hierarchy, and guide the viewer’s eye. Graphic design often uses subtle shadows to separate elements without cluttering the layout. Across all these uses, a poorly placed or overly dark shadow can break trust instantly, while a realistic shadow enhances credibility without being noticed.
Professional retouching studios, including teams like those at Cutout Partner, treat shadows as an essential part of image realism rather than an afterthought. The goal is not to make the shadow visible, but to make it believable.
Preparing Your Image Before Adding a Drop Shadow
Before adding any shadow, the image must be prepared correctly. Clean edges, accurate cutouts, and proper resolution all affect how convincing a shadow will look. If the subject still has rough edges or leftover background pixels, the shadow will exaggerate those flaws instead of hiding them.
Start by isolating your subject using a clean selection method such as the Pen Tool, Select and Mask, or a refined photoshop clipping path. Ensure that the background is either transparent or placed on a solid layer beneath the subject. Working non-destructively by keeping the subject on its own layer allows you to adjust the shadow later without damaging the original image.
Lighting direction should also be considered before you begin. Look at the highlights on the object and imagine where the light source is coming from. A shadow that does not match the existing light direction will feel fake no matter how carefully it is created.
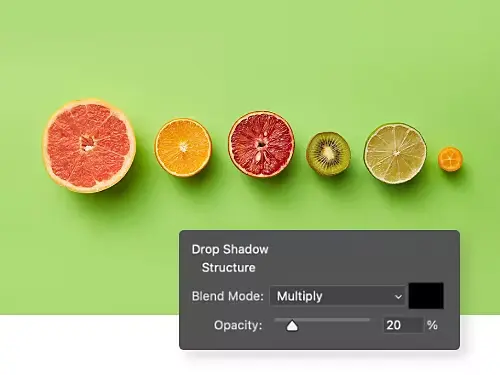
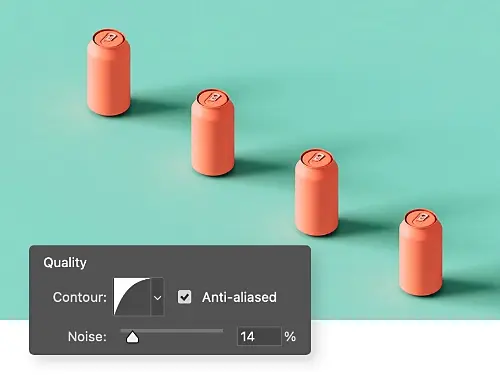
Method One: Using Layer Styles to Create a Drop Shadow
The Layer Style drop shadow is the most common method beginners use, and when applied thoughtfully, it can produce clean and professional results. This method is ideal for text, icons, simple product images, and design elements that need a consistent and editable shadow.
To begin, select the layer that contains your subject. Open the Layer Style panel and choose Drop Shadow. Photoshop will automatically apply a default shadow, which should always be adjusted rather than accepted as-is.
The angle setting controls the direction of the shadow and should match the imagined light source in the image. Distance determines how far the shadow falls from the object, which increases as the object appears lifted higher from the surface. Size controls the softness of the shadow edge, and this softness increases as the shadow moves farther from the object. Opacity controls how dark the shadow appears and should usually remain subtle rather than bold.
For realistic drop shadow Photoshop results, blending mode plays an important role. Multiply is often the most natural choice because it darkens without adding unnatural color. The shadow color should rarely be pure black, since real shadows often contain hints of the surrounding environment.
This method is efficient and flexible, but it can look artificial if pushed too far. Professional editors use it as a starting point, not a final solution, especially for complex product images.
Method Two: Creating Manual Drop Shadows with Brushes and Transforms
Manual shadows offer greater control and realism, especially for product photography and complex shapes. This approach takes more time, but it allows the shadow to follow the object’s form and perspective more accurately.
Begin by creating a new layer beneath the subject. Using a soft round brush set to a low opacity, paint a shadow directly under the object where it would naturally touch the surface. This contact shadow should be darkest closest to the object and fade outward gradually.
Once the base shadow is painted, use Free Transform to stretch and distort the shadow in the direction of the light source. Perspective and Warp tools are particularly helpful for shaping the shadow so it aligns with the surface plane. Applying Gaussian Blur softens the shadow further and helps it blend naturally into the background.
Opacity should be adjusted gradually until the shadow supports the object without drawing attention to itself. This technique is commonly used in professional photo retouching services because it allows precise control over realism and consistency.
Method Three: Using Smart Objects for Non-Destructive Shadows
Smart Objects are essential for non-destructive editing, especially in professional workflows where revisions are common. Converting your subject into a Smart Object before adding shadows allows you to modify the original image without rebuilding the shadow from scratch.
Once the subject is converted, you can duplicate the Smart Object, place the duplicate beneath the original, and fill it with black or a dark tone. This duplicate becomes the base for the shadow. Transform, blur, and reduce opacity until the shadow looks natural.
Because the shadow is linked to the Smart Object, any updates to the subject automatically reflect in the shadow shape. This approach is particularly useful for batch editing product images, where consistency and efficiency matter.
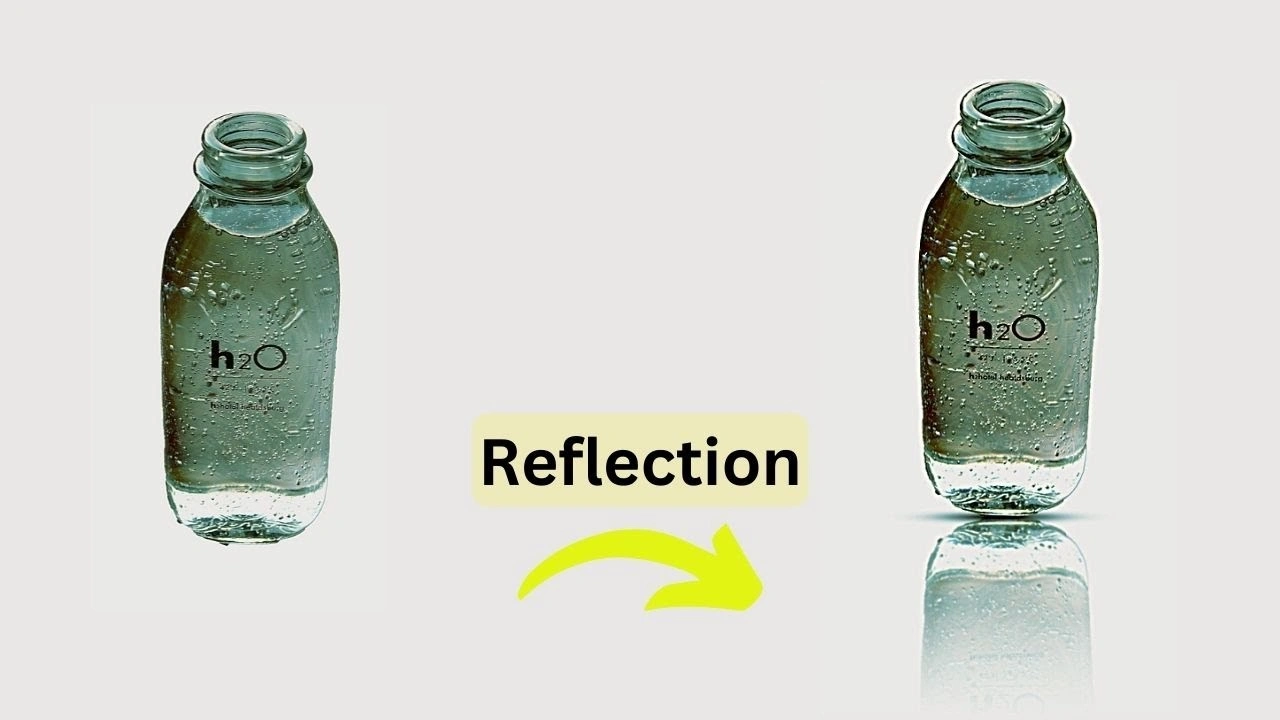
Creating Realistic Natural Shadows for Product Images
Product shadow Photoshop techniques require extra attention because customers rely on images to judge quality and authenticity. A floating product with no shadow feels unfinished and untrustworthy, while a heavy or misplaced shadow feels fake.
Natural shadows consist of two main parts: the contact shadow and the cast shadow. The contact shadow is small, dark, and close to the object, while the cast shadow extends outward and fades gradually. Combining both creates depth and realism.
Surface texture also affects the shadow’s appearance. A matte surface produces a softer shadow, while a glossy surface creates sharper edges and subtle reflections. Matching the shadow softness to the surface type improves realism significantly.
Professional retouchers often study reference images or real product photos to understand how shadows behave in similar lighting conditions. This attention to detail is a defining characteristic of premium services like Cutout Partner, where shadows are crafted to match the product’s environment rather than applied as a generic effect.
How Cutout Partner Uses Drop Shadows, Natural Lighting, and Realistic Reflections
Cutout Partner is a leading photo editing agency that excels in transforming product images into visually compelling assets. By expertly adding drop shadows, they give products a sense of depth and realism, making them feel grounded rather than floating on the background. In addition to basic shadow adjustments, Cutout Partner offers comprehensive shadow creation services, crafting custom shadows that perfectly match the product’s perspective, lighting, and environment for maximum realism.
Their team also carefully adjusts natural lighting to match the scene, ensuring that every highlight and shadow aligns perfectly with the original photo’s light source. Additionally, Cutout Partner creates realistic reflections when appropriate, adding a polished, professional touch that enhances the overall aesthetic. This attention to detail ensures that every product image not only looks authentic but also captures the viewer’s attention, helping brands present their products in the most appealing and persuasive way.
How Lighting Direction, Opacity, Blur, and Distance Affect Realism
Lighting direction determines where the shadow falls and how it stretches. A low-angle light creates long shadows, while overhead lighting creates short, soft shadows. Matching this direction is critical for believable results.
Opacity controls shadow strength and should remain subtle. Overly dark shadows are a common beginner mistake and instantly reduce image quality. Blur controls edge softness, which increases with distance from the object. Distance determines how far the shadow travels and how lifted the object appears.
Blending modes help shadows interact with the background naturally. Multiply remains the most widely used option, but adjusting opacity and color often matters more than the blending mode itself.
Common Mistakes Beginners Make and How to Avoid Them
One common mistake is using pure black shadows, which rarely occur in real life. Another is ignoring the light direction already present in the image. Overusing default Photoshop settings without adjustment also leads to artificial results.
Beginners often apply one shadow style to every image, but each photo requires individual consideration. Shadows should be customized to the object, background, and intended use rather than copied blindly.
Avoiding these mistakes comes with practice and observation. Studying real shadows in everyday environments helps develop an intuitive sense of how shadows behave.
Best Practices for eCommerce, Social Media, and Professional Workflows
In eCommerce, shadows should be consistent across all product images to maintain brand credibility. Subtle, clean shadows work best and should never distract from the product itself.
For social media graphics, shadows can be slightly more stylized to add depth and visual interest, but they should still feel intentional and controlled. Consistency across posts improves visual branding.
Professional retouching workflows prioritize non-destructive methods, organized layers, and reusable techniques. Smart Objects, adjustment layers, and named folders help maintain efficiency and accuracy, especially when handling large volumes of images.
Advanced Tips Used by Professional Retouchers
Professional editors often separate shadows into multiple layers, allowing fine control over contact shadows and cast shadows independently. They may also use gradient masks to control shadow fade more naturally.
Color sampling from the background helps ensure shadows blend seamlessly into the environment. Subtle noise or texture can be added to shadows to match the image’s grain and avoid a digitally smooth look.
These techniques are commonly used in high-end professional photo retouching services, where realism and consistency are essential rather than optional.
Why Professional Expertise Still Matters
While Photoshop offers powerful tools, experience determines how effectively those tools are used. Creating a realistic drop shadow Photoshop effect requires understanding light, form, and context, not just knowing which buttons to press.
Companies like Cutout Partner bring this expertise to every project, combining technical skill with visual judgment to produce results that feel natural and polished. Their approach reflects industry standards where shadows support the image quietly rather than dominating it.
Conclusion: Mastering Drop Shadows for Professional Results
Learning how to make a drop shadow in Photoshop is about more than applying an effect. It is about understanding how light interacts with objects and translating that understanding into believable visuals. From simple Layer Styles to advanced manual techniques, each method has its place depending on the image and its purpose.
By practicing these techniques, observing real-world shadows, and refining your approach, you can create shadows that enhance realism, build trust, and elevate your overall image quality. Whether you are editing for personal projects or aiming for professional-level results, mastering drop shadows is a foundational skill that will serve you across every area of photo editing and design.
You might also read this article
- Best & Affordable Clipping Path Service Provider
- How to Choose the Best Photo Retouching Company
- Photoshop Services Near Me: Why Choose Cutout Partner
- The Complete Guide to Product Photo Retouching
- Product Photography Pricing Guide for Photographers
FAQ: How to Make a Drop Shadow in Photoshop
1. How do I make a drop shadow in Photoshop?
To make a drop shadow in Photoshop, place your subject on its own layer and use the Drop Shadow option in the Layer Styles panel. Adjust the angle, distance, size, and opacity so the shadow matches the lighting direction of your image. For more realistic results, avoid default settings and fine-tune each control based on the object and background.
2. What is the best way to create a realistic drop shadow in Photoshop?
The most realistic drop shadow Photoshop method involves manually creating the shadow on a separate layer using a soft brush, then shaping it with transform tools and softening it with blur. This approach allows full control over shadow direction, softness, and fade, which closely mimics natural light behavior.
3. Why does my Photoshop drop shadow look fake?
A drop shadow often looks fake when it is too dark, too sharp, or does not match the light direction in the image. Using pure black shadows, ignoring surface texture, or relying on default Photoshop settings without adjustment can all reduce realism.
4. How do I change the direction of a drop shadow in Photoshop?
You can change the direction of a drop shadow by adjusting the angle setting in the Drop Shadow Layer Style. For manual shadows, use the Transform or Warp tools to reposition and stretch the shadow so it aligns with the light source in the image.
5. What opacity should a drop shadow have in Photoshop?
There is no fixed opacity value, but most professional shadows remain subtle. In many cases, opacity between 15% and 40% works well, depending on the background and lighting. The shadow should support the object without drawing attention to itself.
6. How do I make a soft shadow in Photoshop?
To create a soft shadow, increase the blur or size setting in the Drop Shadow Layer Style or apply Gaussian Blur to a manually painted shadow layer. Soft shadows are ideal for objects placed on flat surfaces and images with diffused lighting.
7. How do I add a drop shadow to a product image in Photoshop?
For product shadow Photoshop editing, place the product on a clean background and add both a contact shadow beneath the product and a softer cast shadow extending outward. This combination adds depth and prevents the product from appearing as if it is floating.
8. Can I create drop shadows non-destructively in Photoshop?
Yes, using Smart Objects allows you to create non-destructive shadows. When the subject is converted into a Smart Object, any changes made to the original image automatically update the shadow, making this method ideal for professional retouching workflows.
9. What blending mode is best for drop shadows in Photoshop?
Multiply is the most commonly used blending mode for drop shadows because it darkens the background naturally without adding unwanted color. Adjusting opacity and shadow color is just as important as choosing the blending mode.
10. How do professionals create consistent shadows for eCommerce images?
Professionals maintain consistency by using non-destructive methods, controlled lighting assumptions, and standardized shadow softness and opacity across all images. Premium photo retouching companies such as Cutout Partner apply these techniques to ensure product images look realistic and uniform.
11. Should I use black for drop shadows in Photoshop?
Pure black is rarely recommended for shadows because real shadows usually contain subtle color from the surrounding environment. Using a dark gray or sampled background color produces more natural-looking results.
12. How do I fix a drop shadow that looks too harsh?
If a shadow looks harsh, reduce its opacity, increase blur, and soften its edges. Breaking the shadow into multiple layers, such as a contact shadow and a cast shadow, also helps achieve a smoother and more realistic appearance.
13. Is the Photoshop Drop Shadow layer style enough for professional work?
The Drop Shadow layer style is useful for simple designs, text, and basic images, but professional photo retouching services often rely on manual shadows for better realism, especially in product photography and advertising visuals.
14. How long does it take to master drop shadows in Photoshop?
Basic drop shadow techniques can be learned quickly, but mastering realistic shadows takes practice and observation. Studying real-world lighting and experimenting with different shadow methods will improve results over time.
15. When should I consider professional photo retouching services for shadows?
If you need consistent, high-quality shadows for eCommerce, advertising, or large-scale projects, professional photo retouching services can save time and ensure polished results. Experienced teams understand how to match shadows to lighting, surface texture, and brand standards.
Share this post
Ready to transform your images?
Elevate your brand with stunning, high-impact visuals. We’ll refine your photos to leave a lasting impression!
Get Started Now!