In today’s competitive real estate market, high-quality photography can make or break a listing. With buyers spending the majority of their search online, first impressions are formed through images—often in just a few seconds. Mastering real estate photography requires a combination of careful preparation, technical skill, and creative vision. From staging and planning to shooting and post-processing, each step plays a crucial role in showcasing properties at their best.
Real estate photography is a unique blend of creativity and commerce. Unlike other photography niches, it requires both an artistic eye and a solid understanding of business principles. Success in this field comes from knowing how to highlight properties in their best light while delivering images that help sell homes effectively. Here’s a guide to get you started on your real estate photography journey.
Understanding Real Estate Photography
Real estate photography stands apart from other photographic disciplines in its combination of art and business. To be successful as a real estate photographer, you need to understand both. Explore these tips from professional photographers and prepare for your start in the world of real estate photography.
Interior Real Estate Photography
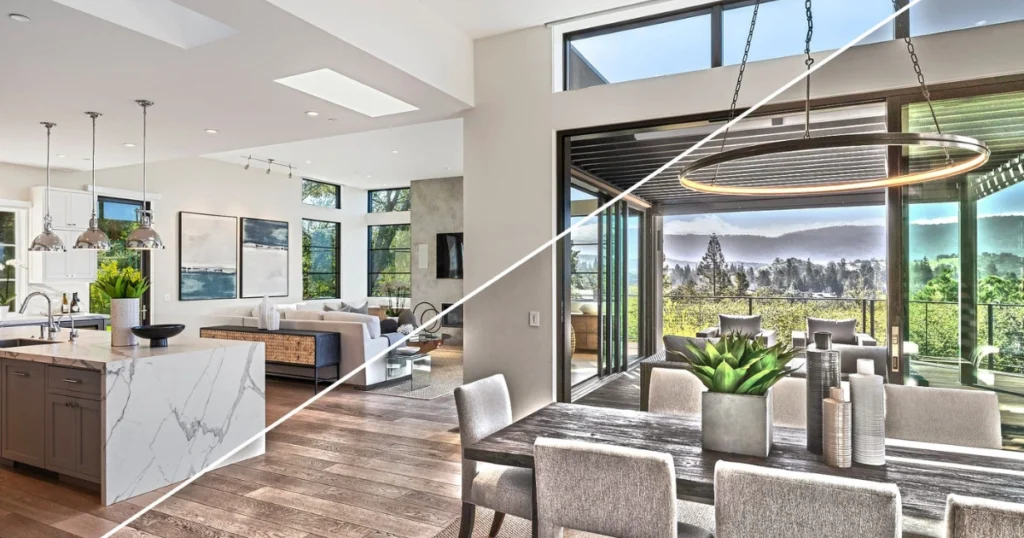
Capturing the interiors of a property requires attention to detail and careful planning. A high-quality interior photograph can dramatically impact a buyer’s perception of a home. Before you start shooting, prepare the space by decluttering, arranging furniture thoughtfully, and ensuring proper lighting. Use wide-angle lenses to showcase the full scope of rooms, but avoid distortion that can mislead viewers. The goal is to make each room look inviting, spacious, and functional.
Exterior Real Estate Photography
The exterior shots of a property are just as important as the interiors. Curb appeal is the first thing potential buyers notice, so highlight landscaping, architectural details, and overall structure. Shoot during times of day when lighting is soft, typically early morning or late afternoon, to avoid harsh shadows. Pay attention to composition, framing the property to emphasize its best angles and surrounding environment.
Why Investing in Real Estate Photography Pays Off
Professional real estate photography is more than just taking pictures—it’s a strategic marketing tool that helps sell homes faster and at higher prices. In today’s digital age, buyers scroll through hundreds of listings on platforms like Zillow or Realtor. Your photos are often the deciding factor: they either capture attention or get ignored.
Investing in professional real estate photography provides several clear advantages:
Sell Faster
Homes showcased with professional images sell significantly quicker. Studies show that professionally photographed properties sell up to 32% faster, reducing time on the market by weeks. High-quality visuals grab attention immediately, encouraging prospective buyers to schedule viewings sooner.
Sell for More
Professional photos don’t just speed up sales—they can also increase sale prices. Listings with high-quality photography can sell for as much as 47% more than homes with amateur images. This translates to higher commissions for agents and greater satisfaction for sellers.
Reach More Buyers
Professional images generate more engagement online. Listings with top-notch photography receive up to 118% more views than those with standard photos. More views mean more qualified buyers, which increases the likelihood of competitive offers.
Stand Out in a Competitive Market
Only around 35% of real estate agents consistently use professional photographers. By investing in professional photography, your listings instantly stand out, giving you a competitive Edge and reinforcing your reputation as a top-tier agent.
What Professional Real Estate Photography Includes
A comprehensive real estate photography package often features high-resolution photos, video walkthroughs, virtual tours, and aerial drone footage. These visuals are captured using professional-grade cameras and enhanced in post-processing to ensure every detail of the property is showcased beautifully.
In today’s fast-moving real estate market, professional photography isn’t just a nice-to-have—it’s a crucial investment that helps sell homes faster, for more money, and with greater exposure.
7 Real estate photography tips for professional results
When you have good visuals, you give your listings the best chance of success. These real estate photography tips for agents will help you create listings that stand out in competitive markets.
1. Choose the Optimal Timing
Lighting can completely transform a property, making rooms feel spacious, inviting, and full of life. Since natural light constantly changes, knowing the best time to shoot is critical for capturing standout real estate photos.
Aim for clear skies or lightly overcast days, when sunlight is soft and even. Clouds act as a natural diffuser, reducing harsh shadows both inside and outside the home, which results in balanced, professional-looking images.
For interior shots, late morning to early afternoon is often ideal. During this window, sunlight is strong enough to illuminate details without creating distracting glare or deep shadows.
For exterior photography, schedule your shoot around the “golden hour”—the first hour after sunrise or the last hour before sunset. This warm, directional light casts a gentle glow across the building and surrounding landscape. The result is a welcoming, almost magical look that highlights textures and gives the property a naturally appealing curbside presence.
2.Timing Your Shots for Natural Light in Large Homes
For larger or more complex properties, knowing when to photograph each room can make a huge difference in how natural light enhances the space. The table below provides guidance for capturing optimal lighting in different areas of the home:
| Room Type | Optimal Time | Weather | Why It Works |
|---|---|---|---|
| East-facing rooms | Morning (8–11 a.m.) | Clear or light clouds | Crisp, bright morning light |
| South-facing rooms | Midday (11 a.m.–2 p.m.) | Slight overcast | Even lighting, minimal glare |
| West-facing rooms | Late afternoon (3–6 p.m.) | Partly cloudy / golden hour | Adds warmth and depth |
| North-facing rooms | Midday (11 a.m.–2 p.m.) | Clear skies | Maximizes limited light |
| Exteriors | Golden hour | Clear / light haze | Warm tones and soft shadows |
Mastering lighting requires both planning and practice. By carefully timing your shoot, you can showcase the property with natural warmth and realism, creating images that instantly resonate with potential buyers.
3. Create a Shot Checklist
Experienced real estate photographers typically deliver 25–35 fully edited images for a standard 3-bedroom home. The listing agent then selects the best shots for the marketing package. Having a structured shot list ensures you capture every essential angle without wasting time.
A comprehensive real estate photography shot list should include:
- Front Exterior: Hero shot from the street, one angled for depth, and one highlighting the entryway.
- Backyard or Patio: Wide shot facing the house, plus a detailed shot of key features like a pool, deck, or garden.
- Entryway: One image facing into the home and one looking back toward the door.
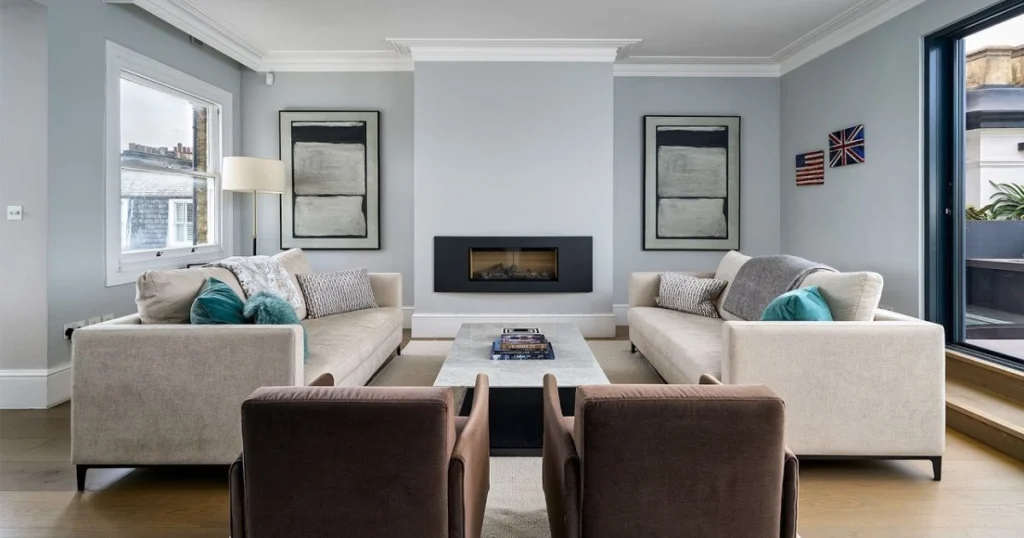
- Living Room: Two corner shots to show layout and one hero shot emphasizing a feature (fireplace, window view, or architectural detail).
- Dining Area: One wide shot and one detail shot focusing on lighting or décor.
- Kitchen: Wide-angle to capture the full space, one highlighting the island or appliances, and one showing flow to the living area.
- Primary Bedroom: Corner angle showing the bed and windows, plus one feature shot (fireplace, reading nook).
- Secondary Bedrooms: One wide shot from the doorway and an optional corner shot if needed.
- Bathrooms: Layout shot from the doorway and one feature shot (vanity, tub, or shower).
- Office/Flex Room: Wide-angle showing functionality and natural light.
- Hallways or Stairs: Only if they contribute to the flow or visual interest.
- Special Features: One or two creative shots of unique elements like a staircase, fireplace, or built-ins.
- Twilight Exteriors (Optional): One front and one back shot, 15–30 minutes after sunset, for a warm, inviting glow.
Focus on 2–4 shots for main feature rooms and just one for smaller areas. The goal is to show the home’s flow and highlight its key selling points—not to photograph every corner.
Pro Tip: Using a shot checklist is invaluable for beginners. It ensures you capture all necessary images efficiently while avoiding over-shooting, saving time during both the shoot and the editing process.
3. Ensure the Property Is Well-Staged
Staging a home transforms it into a neutral canvas, allowing buyers to imagine their own furniture and décor in the space. The objective isn’t to redecorate but to minimize distractions and highlight the property’s potential.
While professional staging may involve adding new items, most homes can look camera-ready with just a few simple tweaks.
Start with cleanliness: Ask clients to wipe down surfaces, vacuum or mop floors, and open curtains to maximize natural light. Then focus on the details—hide cords, tuck away dishcloths, straighten mirrors and wall art. The goal is to create symmetry, clear sightlines, and a calm, balanced atmosphere that photographs well.
Here’s a quick prep checklist to share with sellers before the shoot:
- Living Room: Fluff cushions, straighten artwork, hide cables, and remove clutter.
- Kitchen: Clear countertops except for one accent item, like a bowl of fruit or a small vase. Remove personal items such as fridge magnets.
- Bedrooms: Smooth bedding, arrange pillows hotel-style, and center wall art above the bed.
- Bathrooms: Fold towels neatly, remove toiletries, and leave one small decorative item, like a plant or candle.
- Entryway: Remove shoes, bags, and coats; add a single simple accent like a mirror or small vase.
In most cases, sellers can handle these small adjustments themselves. However, when a home isn’t fully photo-ready, tools like Matterport’s “Defurnish” feature can help. This technology allows you to virtually remove or replace furniture in post-production, creating clean, versatile visuals that help buyers fully envision the space.
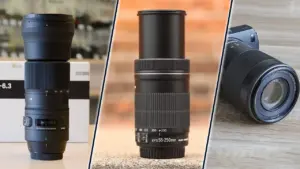
4. Pick the Right Equipment
Choosing the right equipment is key to successful real estate photography, but it’s not about buying the most expensive gear—it’s about matching your tools to the property and its features. The size, layout, and lighting of a space all influence which equipment will deliver the best results.
For standard homes and rentals: A modern smartphone can produce professional-quality images. Devices like the iPhone Pro series ($900–$1,400) work well when paired with a tripod and good natural lighting.
For high-end or commercial properties: A DSLR or mirrorless camera ($1,200–$3,000+) with a wide-angle lens (around 16–35mm) captures crisp, professional shots that truly showcase the property.
For aerial photography: Drone images can boost a listing’s appeal—properties with drone shots sell up to 68% faster. Popular options like the DJI Mini 4 Pro or Air 3 ($800–$1,200) are ideal for homes with large yards or unique exterior features.
For virtual tours and walkthroughs: While smartphones can create virtual tours, a dedicated 360-degree camera simplifies the process and delivers higher-quality results. Cameras such as the Matterport Pro3 or Insta360 X3 can produce photorealistic 3D tours in minutes, making them particularly useful for commercial or luxury listings.
Pro Tip: No matter what equipment you use, skill, lighting, and composition are the most important factors. Choosing the right angles, timing your shots, and understanding the flow of each space can turn even a basic setup into stunning, magazine-worthy images that highlight a property’s best features.
5. Go Beyond 2D Photos With Virtual Tours
Virtual tours are quickly becoming a must-have in real estate marketing, and many agents are surprised to learn that creating them is neither complicated nor costly. Today’s technology makes it easier than ever to produce immersive, high-quality virtual walkthroughs that elevate any listing.
Real estate consultant Mark Simpson notes that recent advancements in imaging tools and software have made virtual tour creation incredibly simple, even for beginners. What once required expensive equipment and hours of work can now be done in minutes with user-friendly cameras and automated processing.
6. Streamline Post-Production
Post-production is where your images truly come to life. This stage includes cropping for stronger composition, adjusting color and contrast, and ensuring whites and highlights look clean and natural.
Modern AI-driven tools within Adobe’s ecosystem can now take over much of the manual editing that used to consume hours. Features like automatic sky replacement, tonal balancing, and intelligent Photoshop color correction help you deliver professional, consistent results faster than ever.
Once your edits are complete, the next steps involve organizing and preparing all deliverables. This includes tagging files, generating floor plans, creating printable layouts, and exporting marketing-ready crops. Publishing workflows should also cover resizing, applying watermarks when needed, and exporting separate versions for web and print.
Using Matterport capture services takes post-production efficiency even further. Every captured property automatically comes with:
- HDR still images
- 3D photorealistic renderings
- A digital twin with interactive walkthrough features
- A dollhouse-style 3D view of the property
- Annotated hotspots and detailed feature callouts
7. Research Real Estate Photography Trends and Innovations
To stay competitive in today’s market, it’s essential to stay informed about emerging trends in real estate photography. New tools and techniques are constantly reshaping how properties are presented, and adopting these innovations can make your listings more immersive, interactive, and visually appealing to buyers.
Key Real Estate Photography Trends in 2025:
- Drone photography and virtual tours are continuing their rapid growth. In many markets, they’ve become standard marketing assets rather than optional add-ons, helping listings stand out with dynamic, aerial perspectives and fully immersive walkthrough experiences.
- Day-to-dusk editing is gaining popularity for its ability to produce eye-catching thumbnails. The warm glow, lit windows, and dramatic sky help a listing pop in a crowded search results page.
- AI-enhanced virtual tours are becoming more advanced. Features like virtual staging and the defurnish tool mentioned earlier allow buyers to visualize the space with their own style, furniture, and layout preferences. This interactive customization gives renters and buyers a deeper sense of connection to the property.
Staying ahead of these trends helps you produce modern, high-impact visuals that keep your listings competitive—and your services in demand.
Take your property listings to the next level with our professional real estate photo editing services
Common Real Estate Photography Types (and Inspiring Examples)
To grow a successful real estate photography business—or elevate your own property listings—you need to understand the core types of real estate photography. Each style serves a unique purpose and helps buyers visualize the property in different ways. Having all four in your portfolio gives you a competitive, well-rounded edge.
Residential Real Estate Photos
Residential photography makes up the majority of most real estate portfolios. This includes single-family homes, condos, townhomes, and high-end luxury properties. Your goal is to highlight the home’s defining features and create a visual story that helps buyers imagine what it would be like to live there.
A great example is this Pasadena virtual tour. Try clicking the “hide furniture” option in the bottom-right corner—it’s a powerful way to show how the same space can feel open, modern, and fully customizable.
Architectural Elements Photos
Architectural real estate photography highlights the structure, craftsmanship, and distinctive design features of a property. This style focuses on elements such as textures, symmetry, materials, patterns, and strong architectural lines. These images are often used not only by real estate agents but also by architects, interior designers, builders, and property developers for marketing materials, portfolios, and high-end publications like Architectural Digest and Dezeen.
A great example is “Airbnb’s Most Popular Treehouse,” which has been showcased in more than 300 articles and TV features—including major outlets like Architectural Digest and Condé Nast Traveler—because of its striking architectural character and unique design appeal.
Beyond structure, architectural photographs capture the space’s ambiance — the elements that give a property its unique personality. This could be the fun, sun-filled energy of an outdoor BBQ patio, the warm glow and intimate charm of a rustic cabin, or the sleek, modern feel of a luxury condo interior. These images don’t just show what a place looks like; they communicate how it feels to be there.
Architectural photography also plays a crucial role in documenting key milestones throughout a building’s design and construction process. From early framework shots that illustrate progress to final completion images that highlight craftsmanship and detail, architectural photos preserve the story of the structure from concept to reality. This makes them valuable not only for marketing, but also for architects, designers, builders, and future owners who want a visual record of the property’s evolution.
Exterior real estate photos
Exterior photography highlights a property or location’s outdoor elements from multiple angles, often incorporating both ground-level and aerial perspectives. These images help real estate agents present not just the home itself but also its relationship to the surrounding environment. By capturing nearby streets, parks, and community features, exterior photos give potential buyers a clearer sense of the neighborhood and overall lifestyle.
These visuals also emphasize natural elements such as landscaping, outdoor amenities, and curb appeal. They can illustrate how the property interacts with different seasons — whether it’s a lush summer garden, vibrant fall foliage, or a crisp winter setting — helping buyers imagine the home year-round.
Below is a digital twin of Kasugai Gardens — a meticulously designed Japanese garden in Kelowna, BC. This type of digital recreation demonstrates how exterior photography and 3D imaging can preserve intricate spaces with remarkable accuracy, offering viewers a chance to explore environments remotely while still appreciating their depth, texture, and beauty.
Commercial real estate photos
Commercial real estate photography showcases office buildings, hotels, retail spaces, and mixed-use properties with the goal of appealing to a wide range of audiences. Beyond attracting potential tenants or buyers, these images help future employees, customers, and partners imagine how they would interact with and move through the space. A well-executed commercial photo set communicates functionality, atmosphere, and brand identity.
Because commercial properties often represent businesses publicly, these photos are frequently used across company websites, social media profiles, brochures, and other marketing materials. High-quality visuals play a major role in shaping brand perception, conveying professionalism, and building trust with new visitors or clients.
Check out this virtual tour of Manchester’s Craft Market. Each store is digitally tagged, allowing virtual shoppers to explore the market and instantly access vendor details. It’s an excellent example of how modern commercial real estate visuals can merge photography, digital mapping, and interactive technology to create immersive customer experiences.
Pro tip: When photographing commercial spaces, make sure to capture amenities that add value and influence decision-making — such as parking lots, lobbies, landscaping, signage, and nearby businesses. These elements help potential visitors or employees understand the full environment. High-quality images showcasing these features are often used in marketing materials to encourage guests to book a hotel stay, visit a store, or even apply for positions.
Test the power of 3D tours for real estate
In today’s fast-scrolling digital marketplace, buyers skim through dozens of listings in a matter of minutes. This makes compelling visuals more essential than ever. Strong, well-composed photography stops the scroll, creates an emotional connection, and converts casual interest into real showing requests from serious buyers.
If you want to elevate your listings even further, 3D tours provide an immersive experience that traditional photos can’t match. They allow potential buyers to explore a property at their own pace, increasing engagement and boosting confidence in the listing.
Download the Matterport app to start capturing your own 3D tours and transform the way you market real estate.
You might also read this relevant resource:
How to Take Real Estate Photos: A Complete Guide
How Cutout Partner’s Photo Editing Enhances Real Estate Properties
In the competitive world of real estate, high-quality images can make the difference between a listing that sells quickly and one that languishes on the market. Buyers often make split-second decisions based on the first images they see online, so every detail matters. This is where Cutout Partner, a premium photo retouching company, can transform property visuals and elevate listings to the next level.
Why Real Estate Photo Editing Matters
Real estate photography is more than just snapping pictures—it’s about showcasing a property in its best light. Even professional photos can benefit from post-production to correct imperfections, enhance colors, and highlight key features. Clean, vibrant, and visually appealing images create trust with buyers and help them visualize living in the space.
Explore More Another Resources
- How to Adobe Photoshop 7.0 Free Download (Updated Guide)
- How to Use ImgBB for Free Image Hosting: A Complete Guide
- Black Friday Deals For Photographers : A Complete Guide
- Lilac Color Updated Guide: Meaning, Codes & Design Uses
- How Big Is a 5×7 Photo? A Detailed Breakdown
- Best 3 Point Slinger For Camera On Professionals (Updated Guide)
How Cutout Partner Enhances Real Estate Images
1. Color Correction and Lighting Adjustments Cutout Partner ensures every photo has balanced lighting and accurate colors. Interior rooms are brightened, shadows minimized, and natural light enhanced to make spaces feel open and inviting. Exterior shots are optimized to highlight landscaping, architecture, and curb appeal, giving potential buyers an immediate positive impression.
2. Object Removal and Decluttering Clutter, stray cables, or remove unwanted objects can distract from a property’s true potential. Cutout Partner’s expert editors remove unnecessary items seamlessly, leaving a clean, professional look. This helps buyers focus on the home’s features rather than distractions.
3. Perspective and Distortion Correction Wide-angle lenses, commonly used in real estate photography, can create distorted lines. Cutout Partner corrects these perspective issues, ensuring that walls, windows, and architectural elements appear straight and proportional. This provides a more realistic and visually pleasing representation of the property.
4. Sky Replacement and Outdoor Enhancements The exterior of a home plays a major role in first impressions. Editors can replace dull skies with bright, inviting ones and enhance landscaping, greenery, or water features to create a polished, eye-catching look. These enhancements make listings more attractive and can boost click-through rates online.
5. Virtual Staging Not every property comes fully furnished or styled for photography. Cutout Partner can digitally stage empty rooms, adding furniture, decor, and accessories to help buyers imagine the potential of a space. Virtual staging increases engagement and helps homes sell faster.
The Benefits of Using Cutout Partner for Real Estate
- Faster Sales: Professionally retouched photos attract more buyers, leading to quicker showings and faster transactions.
- Higher Perceived Value: Well-edited images make a property appear more valuable, often resulting in higher offers.
- Consistent Quality: Every image is edited to maintain a consistent, high-end look across a listing or portfolio.
- Time Savings: Agents and photographers save hours by outsourcing detailed retouching work to experts.
Rounding Up
Mastering real estate photography requires careful staging, strategic timing, the right equipment, and professional editing. By combining these elements with virtual tours and modern trends, agents and photographers can create listings that capture attention, drive inquiries, and sell properties faster. With a strong understanding of preparation, shooting techniques, and post-production, you can transform ordinary listings into visually compelling experiences that inspire buyers to act.